July 8, 2017 : Rig Improvements – Head/ Face Edges (Part 1)
As previously stated, several changes were made to the character rigs for Ad Wizards. A big one was with the head/ face.
In past projects, the head was modeled like the rest of the body… three dimensionally in Lightwave. However, when I rendered out Edges, the lines around the jaw and chin area were not always consistent. Their presence depended upon the camera angle and head position/ orientation.
This took away from the cartoon look I wanted; and the only remedy I had was to add in edges after the fact in After Effects, a process that wasn’t incredibly precise and rather time consuming.
My solution was to replace the head with a flat plane.
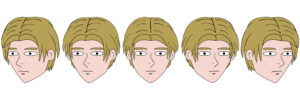
A drawing of a face was created and projected onto this plane. Using Illustrator, I created a face for each character at five different angles – Head On (Portrait) shot, two Three Quarter shots (one for the left side and one for the right), and then two in between shots (one for the left and one for the right):
Technically, there was a flat plane for each angle of the face. They were all identical in their size and initial position, and each plane had its own surface, with each surface having the appropriate image projected onto it.
During animation, I chose which face angle I wanted and had the remaining planes out of the camera’s view (I set their y-position to some incredibly large value so it was out of sight).
The end result was that the faces had consistent edges, and I did not have to worry about spending any time in After Effects fixing aesthetic hiccups. Another good thing was that I did not have to maintain one constant face angle for a specific sequence. If I wanted to have the character turn their head, I was able to animated through the various angles and it looked pretty smooth.
That said, there were some drawbacks/ limitations. While I enjoyed the Edge control this afforded me, the work in Illustrator was time consuming. Once I got into a flow, things did go fairly quick – plus, I was able to reuse certain aspects and features from previous characters. That said, it did require an extra step in the design phase. In many cases, I was able to mirror the right and left sides; however, this was not the case for characters who had hair that was asymmetric.
Another limitation was the characters’ range of motion. Only having 5 images did limit how much I could turn their heads. Plus, I was unable to have camera shots from above or below since the image of the head would not be consistent with the rest of the body. If I had more time, I could have created more angles to improve the range of the motion for the head. For this project, it was deemed unnecessary.
Overall, I felt the positives of this rig outweighed the negatives in achieving the look I wanted for this project. At the same time, I know I can build on this setup going forward if I have future projects with similar design and aesthetic goals.
In a future post, I plan to cover in more detail how I dealt with the specific features of the face (the eyes, mouth, nose, and in some instances hair).
posted by Pi Visuals at 1:02 am
Tags: Ad Wizards , After Effects , LightwaveComment
August 29, 2016 : Spline Action!
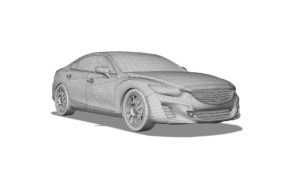
I recently had a project that required a detailed model of a car. At first, I was hoping to use an existing model in Lightwave’s Content Library, but that was a dead end. As a result, I modeled it myself – which is something I have never done. Below is a render of the wireframe:
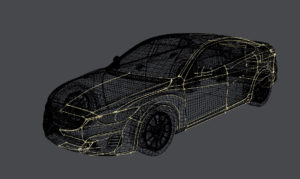
The model is based off the Mazda 6, with an added logo on the grill. The modeling required plenty of splines, a technique I never really used. In fact, I had to reacquaint myself many of the tools related to splines. Fortunately, I was able to pick things up quickly because there were plenty of splines used. Below is a Modeler screenshot with all the splines selected and the car model in the BG layer:
After Modeling everything, which took about 40 hours or so, I threw it into Layout and did some rendering (well technically, I did some minor rigging and animating first). I used the multi-pass rendering technique described in a previous post. The result is the render shown at the top of the post.
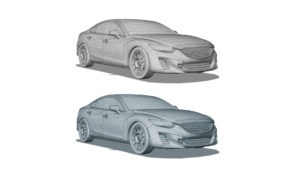
No doubt, detailed surfacing would have increased the amount of time needed for the model, but fortunately that was not part of the scope of the project. I did end up adding a small color correction in After Effects (the Curves effect). Below is a shot before and after the correction:
The effect was subtle and done to better match the car to the video’s color palette. All in all, the use of Splines was challenging, but I can definitely see it’s power. It would be interesting to see how I can apply the technique to other modeling; but to be honest, I think I am still much more comfortable with ‘old-school’ box modeling. Although, never say never…
posted by Pi Visuals at 2:58 pm
Tags: After Effects , LightwaveComment
January 2, 2016 : Updated Reel (Finally)
Over the last couple months, I’ve been working on updating my Motion Graphics Reel – something I’ve been meaning to do for far too long. My goal was to create new material to splice in with existing clips. While I was hoping to include more that used Lightwave (via DP Kit), the bulk of the new clips used After Effects.
With the music, I tried something different. I decided not to record any tracks with my guitar. Instead, everything was done via MIDI controllers (predominantly a keyboard), using several non-instrumental synth sounds. The mixing was done in Adobe Audition.
posted by Pi Visuals at 11:28 pm
Tags: After Effects , DP Kit , LightwaveComment
October 13, 2015 : Multi-Pass Rendering In Lightwave (and After Effects)
After realizing Ambient Occlusion/ Global Illumination wasn’t going to cut it for animations, I turned to Multi-Pass Rendering with area lights. The idea of using some form of GI appealed to me because I wanted to composite a shadow layer on top of the main render. While this would require an extra step in my pipeline, I believe the additional control would result in an improved final render.
My next step was determining if Multi-Pass Rendering does improve the final render, thus justifying the additional work. While testing out AO, I noticed the shadow pixelation/ flickering was less noticeable for the darker gray uniform of the Walrus object. To make sure the object wasn’t inherently hiding any problems, I brightened the object’s surfaces – making it lighter and more colorful. I used these surfaces for the Multi-Pass Renders.
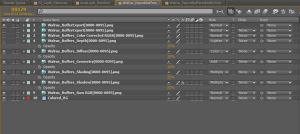
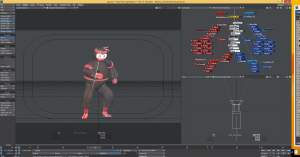
After making an Area-Lights-Only render, I used the Compositing Buffer Export in Lightwave to create multiple buffer renders. These were imported into After Effects to composite the final render. I then spent some trial-and-error time tweaking the Opacity and Blending Modes for the various buffers. Below is a shot of the Layer Panel, showing the settings I ended on:
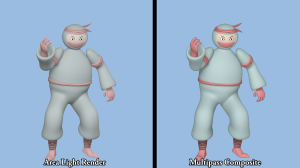
Once I got things to look pretty decent, I made a video doing a side-by-side comparison between the Area-Lights-Only and Multi-Pass Renders:
For easier viewing, below is a single frame of the video:
The Multi-Pass Render is definitely more dynamic. I want to get a better handle on the Opacity and Blending Mode settings for each render pass, but I am convinced that the Multi-Pass Render provides the additional control and improved render quality I was targeting.
posted by Pi Visuals at 12:37 am
Tags: After Effects , LightwaveComment
September 17, 2015 : Ambient Occlusion Testing
Over the past week, I’ve had some time to work on one of my recently set Lightwave goals – Ambient Occlusion Rendering. I’m still in the early phases, but progress has been made.
Most of my time has been spent researching techniques for Ambient Occlusion. I want to find a method where quality meets practicality. I have found a few promising ones; but while doing so, I realized that I will need a render that will satisfy animations (as opposed to still shots).
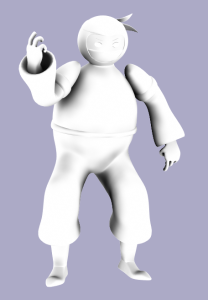
As such, I am creating a short animated sequence (on the order of three or four seconds) that includes an object moving as well as a camera zoom. Below is a screenshot of who I will be using as my test object:
As if there was any doubt that I was going to use a ninja! Actually, I originally set up a file with one of the characters from Taking Shape, but then I found it to be a poor choice due to the rather simplistic/ orthogonal geometry.
I am still working on the animated sequence, but I have done a few preliminary test renders for one AO technique. Below is a render with settings that I was happy with:
I haven’t put anything into After Effects for compositing. I intend on working through a few AO methods in LW before I export the renders. I believe this will be the best way for me to do a side-by-side comparison of the end results.
posted by Pi Visuals at 12:22 am
Tags: After Effects , Ambient Occlusion , Ninja Tales , ShapesComment
December 18, 2014 : DBZ Style Disappearing Effect
For the past month, I’ve wanted to reproduce the ‘vanishing’ effect often used in DragonBall Z fight scenes. I always thought it was cool and wanted to figure out a way to create it. DBZ just started replaying on Adult Swim from the first episode, and I just purchased the upgrade to Lightwave 2015. Those were reasons enough. Below is the final product.
I went with two characters from Ninjas Tales because… well, they’re ninjas. It was fun to revisit those models. The animation done in Lightwave was pretty minimal – it was basically a kick. Most of the work was done in After Effects, which was used to create the actual ‘disappearing’ effect. Throw in a few sound effects, and this short took less than a week to crank out.
posted by Pi Visuals at 11:53 pm
Tags: After Effects , DBZ , Lightwave , Ninja TalesComment
May 30, 2010 : We’re Gonna Need A Montage
Things have been pretty hectic lately – to say the least. Anyway, here you go:
Hopefully this sheds a little light as to why I haven’t been around to post in the last few weeks.
posted by Pi Visuals at 9:41 am
Tags: After Effects0 Comments | Post a comment
March 14, 2010 : Happy PI Day!!!
Everybody’s favorite day has arrived. That’s right, Pi Day.
So to everyone – may you have a nerdy Pi Day.
As a reminder, IE6 and IE7 might have issues playing files from Vimeo. Therefore, it is recommended you use a different browser (I suggest Mozilla).
posted by Pi Visuals at 1:15 pm
Tags: After Effects , Pi2 Comments | Post a comment

