July 18, 2017 : Rig Improvements – Head/ Face Edges (Part 2)
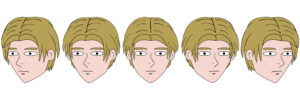
In the previous post, I introduced changes made to my rig around the head/ face area for my recent project. This required a drawing at five different head positions for each character and projecting each onto a flat plane.
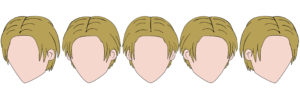
Since I animated the eyes and mouth within Lightwave, these drawings were actually temporary. The final image used for the final projections actually looked like this:
The eyes, nose, nostril, mouth, and chin mark were then modeled in Modeler – with morphs created for the eyes and mouth. This borrowed the technique I used in a previous project, Taking Shape (although the separate eyes was used in a project prior to that, Ninja Tales).
Technically, I did not need to model the nose/ nostril and instead could have kept the drawn version from the temporary file. However, I liked having more control over its rotation, position, and scale in Lightwave.
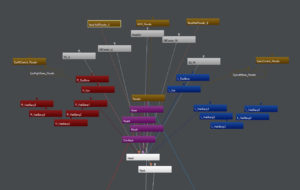
Each feature of the face had its own bone, which were all parented to the head bone – the bone that controlled the position and rotation of the face image planes. Below is a schematic view of this portion of the rig:
One of the main characters also modeled the front two bangs for additional animation control, which is reflected in the image above.
For each of the five different head positions, I placed the facial features in their correct position and scale (for the nose, I also had to adjust its rotation. These keyframes were saved in the base Rig Scene for the character, and then I was able to copy these settings at any point within future scenes.
If a movement required a head turn, I would simply sequence the keyframes as needed (usually on 1’s or 2’s, depending on the movement). This could have been better automated/ controlled and might be something I pursue in future projects.
Overall, this process wasn’t very difficult or time consuming to create since I reused many of the facial features. Thus they didn’t have to get modeled from scratch each time for every character. It did take a few extra minutes to animate head turns, but it was worth it for the additional control of the edge lines.
For the last part in this series of posts, I will discuss how the movement/ orientation of the head was controlled during animation – ensuring the cartoonish look I originally intended when deciding on this rig setup.
posted by Pi Visuals at 9:54 pm
Tags: Ad Wizards , Lightwave , Shapes


