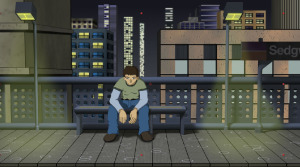
November 16, 2014 : Behind The Scenes – Raining Platform Part 4: Fake Lighting
The last subject in Raining Platform’s Behind-The-Scenes thread is the fake lighting for the lamp posts. This wasn’t a major effect, but it was a nice detail that came out nicely and was worth sharing. I considered creating the lighting in Lightwave. However, since I was using multiple renders on different layers, I didn’t think this was the best way.
To better show the final post lighting, below is a shot without the rain. Notice how the opacity of the yellow light is greater near the platform and gradually becomes more transparent as it reaches the source:
I began with a yellow solid. To taper its transparency, I used a Track Matte. Below shows the setup of this in After Effects.
The yellow solid layer is [Faux Light]. By selecting a Luma Track Matte, the opacity of the Faux Light layer will be dictated by the brightness of the image above it (in this case [Gradient]). When the Gradient layer is white, Faux Light will have a 100% Opacity. Conversely, when the Gradient layer is black, it will be completely transparent. As a side note, you can also use Track Mattes with an Alpha setting – where a layer’s opacity will be dictated by the above layer’s opacity. This is another technique I commonly used.
Back to this project, to have the Faux Light layer get progressively more opaque the further down it goes, I created a simple black/ white gradient via the Ramp effect. Below is that gradient (for the Gradient Layer):
It took a little tweaking to get the gradient exactly how I wanted. To make the effect more subtle, the top part of the gradient wasn’t pure black nor was the bottom part pure white. I then set the Blending Mode for the Faux Light layer to Screen and lowered it’s opacity a little more (just for good measure).
The last step was creating the masks to outline the actual shape of the light. Below shows the solo-ed light without the Track Matte (top) and with the Track Matte (bottom).
And that is how I was able to get the lighting for the posts – done entirely in After Effects. Using Track Mattes to taper the layer’s opacity made for a nice, subtle touch that I was particularly proud of.
Well that wraps up the forth (and final) part of the Behind-The-Scenes for Raining Platform. They all focused on work done in After Effects, which did most of the heavy lifting in this project. Honestly, much of what I did was pretty straight forward and didn’t require a great deal of knowledge. All you really need is the basic ability of knowing how to navigate through the program and then toying around with its features.
Anyway, if you have any other questions, or would like to hear about another aspect of the animation, feel free to hit me up – I wouldn’t be against making another part or two if its on a subject worthwhile.
posted by Pi Visuals at 6:03 pm
Tags: Behind The Scenes , Raining Platform


