November 8, 2014 : Behind The Scenes – Raining Platform Part 2: Rain Effect
The next topic to cover in the Behind-The-Scenes for Raining Platform is the Rain Effect. The visual aspect that sold the weather for the short was the foreground rain. This was created via the CC Particle World Effect. I toyed around with the settings to get the look I was going for, and I don’t want to go through every setting used; but the animation producer was ‘Direction Axis’ and the Particle Type was Line.
To add depth to the rain, I increased the radius of the particle producer on the Z-axis. This varied the apparent particle sizes. Lastly, to soften the droplets, I added a small amount of blur to the layer.
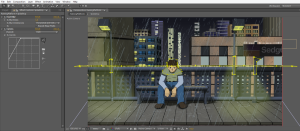
To help sell the rain, I added a ‘Splash Up’ layer. This was to mimic the rain splashing/ bouncing back off the platform railing and sign. This was a new layer with rain particles. The setting were similar to the main Rain layer, but the main difference was increasing the number of particles and having the direction straight up and down (versus a slight diagonal angle). The layer was pre-composed, which allowed me to create masks to isolate the specific locations for the splashing. The image below shows these masks.
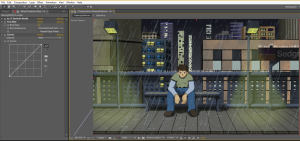
The masks were slightly feathered to soften the effect. Just as before, I added a small blur. To help differentiate this layer from the main rain, the Splash Up layer was significantly lightened via Curves.
The last element added to cement the rain effect was the puddles on the platform. To do this, I created a composition with a Shape Layer of a circle. I set keyframes for its size and opacity so that it starts small and expands out (while eventually fading out). With the Size and Opacity keyframes set, I added the expression “loopOut(type=’cycle’, numKeyframes=0)” to each of these parameters.
This expression loops the animation I created to continue through the length of the layer (rather than just occurring once). The great thing about this is if I feel the circle is moving too slow or fast, I only need to adjust the original keyframes, and the animation will loop to the new speed.
After the initial Puddle layer is created, I made a few similar, but slightly different, layers just for the sake of variety. I even used a few masks so the some of the circles aren’t always connected. These Puddle layers were then placed into a new composition (called PuddleSum) at varying sizes and locations. I believe there were about 50 copies of the various Puddles layer in the PuddleSum composition. It was a little time consuming to get everything where I wanted, but it wasn’t too cumbersome.
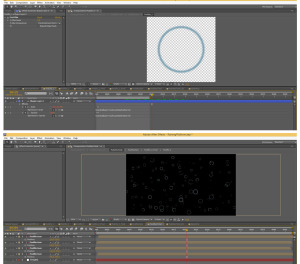
I then placed several copies of these PuddleSum compositions into a final PuddleTotal composition. The image below shows the original Puddle composition on top, and then the PuddleTotal composition below it.
Things get a little tricky here. I then put the PuddleTotal comp into a new composition (called PuddleTotal2D). The PuddleTotal comp is turned into a 3D layer and rotated on the x-axis to match the orientation of the platform. Now I could have done this directly in the final composition. However, this would have resulted in problems because I would not have been able to put it behind the foreground train layer while still keeping it in front of the rest of the other layers (layer order of 3D layers with 2D layers can be tricky like that). As such, I took this final 2D comp and placed it in the final composition. I then used a few masks to ensure the puddles stayed only on the platform.
That’s about it for the Rain effect. It might appear a little complicated, and I probably could have used a few more pictures to illustrate my workflow; but it honestly wasn’t as difficult as it sounds. Also, sorry for using the words ‘Puddle’ and ‘Composition’ way too much in this post. Still, I hope it helped explain things… even if only for a little. Next time, I will cover the Lightning Effect – along with the lighting that results from the strike.
posted by Pi Visuals at 12:49 am
Tags: Behind The Scenes , Raining Platform


