November 5, 2014 : Behind The Scenes – Raining Platform Part 1: Overview
So after the numerous requests by countless readers, I decided to make a few posts discussing how the Raining Platform animation was made (I am thinking there will be four in all). Since a lot of the heavy lifting for the clip was done in After Effects, I’m going to focus on the work done in this program.
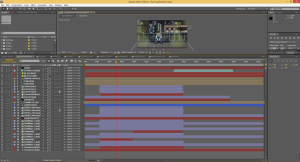
For this post, I will briefly cover a few high-end topics about the animation. Below is a shot of the final composition within After Effects.
As you can see, there were plenty of layers and elements that went into the final composition. To illustrate visually how much After Effects transformed things, below is a before and after for the first frame.
One of the first things that should stand out is how much darker the final image is. Darkening the various elements was done to adequately convey the stormy, nighttime setting. This was actually one of the last steps done, but I wanted to touch upon it briefly. I like using the Curves effect for this, and below was a typical setting I used for each of the layers:
Curves was used on many of the layers; and I could have used an adjustment layer to darken the project as a whole, but I like individually tweaking the brightness for each layer since some needed it more than others.
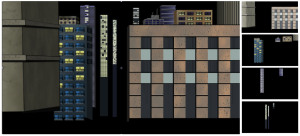
The next topic to cover is the background buildings. There were a total of 12 buildings created in Photoshop. I saved these out to four different images, which was done to differentiate between the closer buildings and the farther away ones. The image below shows the final background on the left, along with the four Photoshop-created files to the right.
In addition to Curves to darken things, I used a slight Gaussian Blur on the farther back buildings to fake a Depth-Of-Field look. The buildings received less and less of a blur up until the foreground buildings, which had none. I considered using more blur in the farther back images, but I wanted a more subtle look. I’m not sure how noticeable the effect is, which is what I was going for.
That’s enough for this ‘Behind The Scenes’ post. Next time, I will discuss how I created the rain elements.
posted by Pi Visuals at 9:50 pm
Tags: Behind The Scenes , Raining Platform


